The Ultimate Clash of Clans Attack Guide: Strategies to Go From Zero to Hero
Introduction: Why Your Attacks Are Failing (And How to Fix Them)
You’ve spent hours upgrading your troops, carefully planning your base, and farming for resources. You tap the “Attack” button, your heart pounds as your troops deploy, and then… chaos. Your Barbarian King gets stuck on a wall, your Wizards wander off to a builder’s hut, and your prized Golems are vaporized by an unseen Inferno Tower. One star. Maybe even zero.
If this sounds familiar, you’re not alone. The difference between a frustrating one-star attack and a glorious, resource-rich three-star victory isn’t just about having max-level troops. It’s about a **proven system**.
Winning in Clash of Clans isn’t a matter of luck. It’s a science. This guide is your masterclass. We will deconstruct the art of the attack into a step-by-step framework, covering everything from pre-battle reconnaissance to the final, decisive spell drop. Whether you’re a Town Hall 9 mastering your first Heroes or a Town Hall 14 veteran facing a labyrinth of defenses, the principles here will transform your gameplay.
Chapter 1: The Pre-Attack Blueprint – Knowledge is Power
You wouldn’t build a house without a blueprint, so why launch a costly attack without a plan? The most critical phase of any successful raid happens *before* you drop a single troop.
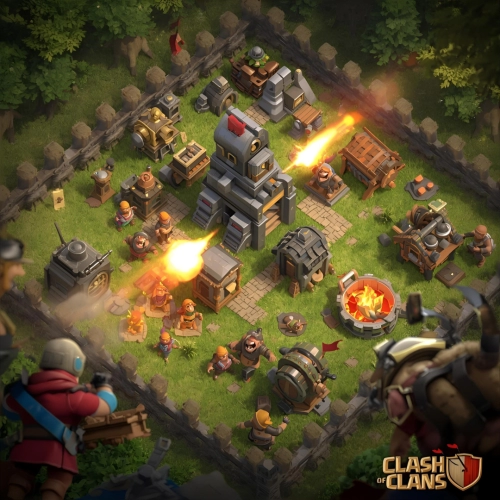
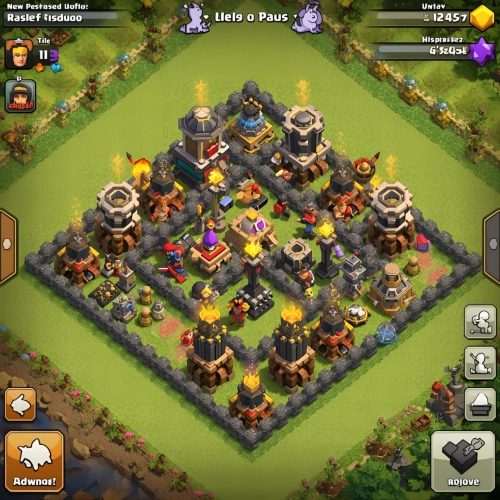
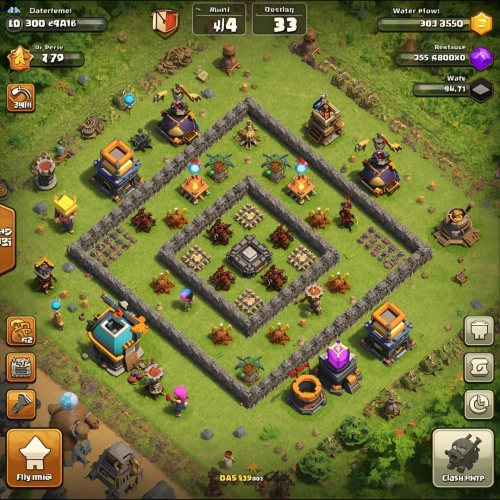
1.1. Scouting: Reading the Enemy Base Like a Book
Every base tells a story. Your job is to read it. A 30-second scout can reveal the entire defensive strategy of your opponent.
- Identify the Town Hall: Is it centralized for a protected one-star win, or exposed for a easy snipe? This dictates your win condition.
- Locate Key Defenses: Your eyes should immediately find:
- Inferno Towers (TH10+): Are they set to Multi (wipes out swarms) or Single* (melts high-HP targets)? This single-handedly determines your army composition.
- Eagle Artillery (TH11+): Where is it? What will trigger it? You need to plan your attack so your main force doesn’t activate it too early.
- X-Bows: Are they set to Ground & Air or just one? Are they centralized or covering a specific compartment?
Sweepers: What direction are they pushing? You always want to attack into the sweep, not with it. - Map the Compartmentalization: Look for weaknesses in the wall structure. Are there funnels you can easily create? Are there jump spell value spots?
1.2. Picking Your Win Condition: The Core of Your Strategy
A “win condition” is the primary method your army uses to destroy the base. Choosing the right one for the base you’re facing is 90% of the battle.
Common Win Conditions:
- The Kill Squad: A focused group (e.g., Royals + a few support troops) sent to eliminate a key part of the base, like the Enemy Queen, Clan Castle, or an Inferno Tower.
- The Main Force: The bulk of your army that will core through the base (e.g., Pekkas, Hog Riders, Balloons).
- The Siege Machine: Your secret weapon from the Clan Castle. The Log Launcher (to break walls and defenses), Wall Wrecker (tanky and breaks walls), or Stone Slammer (air siege) can define your entire attack path.
1.3. Army Composition: Building the Right Tool for the Job
Your army must support your win condition. Don’t just copy a YouTube army; understand why it works.
- Tanks (The Meat Shields): Golems, Ice Golems, Lava Hounds, Pekkas. Their job is to absorb damage while other troops deal it.
- Damage Dealers (The DPS): Wizards, Dragons, Bowlers, Balloons, Hog Riders, Miners. They are fragile but essential for destroying defenses.
- Support & Utility: Healers (for Queen Walks), Wall Breakers (for opening compartments), Cleanup Crew (Minions, Archers).
Pro Tip: Always have a plan for the Clan Castle troops . Luring and eliminating them before your main push is non-negotiable at higher levels.
Chapter 2: Mastering the Fundamentals: The Non-Negotiables
These core concepts are universal. Ignore them, and your attacks will fail, no matter how good your army is.
2.1. The Art of the Funnel: Controlling the Chaos
This is, without a doubt, the most important skill in Clash of Clans. Funneling is the process of clearing outside buildings so that your main force pushes into the center of the base, rather than circling the outside.
How to Create a Funnel:
- Deploy a tank (e.g., Golem, Ice Golem) in front of the area you want to enter.
- Use splash damage (e.g., 2-3 Wizards) on each side of your entry point to clear the outer buildings.
- Once the path is clear, deploy your main force (e.g., Pekkas, Bowlers, Yetis) directly behind the tank.
A perfect funnel feels like magic—your troops march obediently into the heart of the base. A failed funnel looks like a toddler’s birthday party—chaotic and messy.
2.2. Spell Placement: Timing is Everything
Spells are your most powerful tools, and wasting them is a cardinal sin.
- Rage Spells: Don’t drop them on full-health troops. Place them so your damage dealers move through the rage effect as they engage key defenses.
- Heal Spells: These are for your damage dealers, not your tanks. Perfect for healing Hog Riders or Miners as they tank point defenses.
- Freeze Spells: The ultimate “off” button. Use them to freeze Inferno Towers (especially Single-target), Eagle Artillery, Scatter Shots, and groups of multi-target defenses. A well-timed freeze can save your entire army.
- Poison Spells: Primarily for the enemy Clan Castle and Hero altars. Drop it early on the defending troops to slow and weaken them.
2.3. Hero Management: Your Key to Consistency
Your Barbarian King and Archer Queen are not just another troop. They are strategic assets.
- The Queen Walk/Charge: Using a Healer (or four) on your Archer Queen to clear a large portion of the base solo. This is a high-skill technique that can eliminate an entire flank, create a funnel, and take out key defenses.
- The King’s Role: The Barbarian King is a fantastic tank and funneling tool. Use his ability to rage and heal when he’s deep in the base and tanking heavy fire.
- Warden Watch: The Grand Warden is a game-changer. Keep him on Ground mode unless your army is purely air. His ability makes troops invincible—save it for a cluster of Giant Bombs, a Roaster, or when the Eagle Artillery is about to fire.
Chapter 3: Proven Attack Strategies for Every Town Hall (TH9-TH14)
Let’s apply these fundamentals to specific, meta-defining strategies.
3.1. Town Hall 9: The Golden Age of War
Strategy: GoHoBo (Golems, Hog Riders, Bowlers in CC)
Army Comp: 2 Golems, 4-6 Wizards, 10-15 Wall Breakers, 20-25 Hog Riders, 1-2 cleanup troops. Spells: 2 Heal, 1 Rage, 1 Poison (+1 from CC). Clan Castle: Bowlers + Poison.
The Plan:
1. Kill Squad: Deploy your Golems and Wizards to create a funnel. Use your King, Queen, and the CC Bowlers (under a Rage spell) to form a “kill squad” that punches into the core. Their goal is to take out the enemy Queen, Clan Castle, and at least one X-Bow.
2. Surgical Hogs: Once the core is disrupted, deploy your Hog Riders in small groups on the back end of the base. Use Heal Spells to keep them alive as they clear the remaining defenses.
3. Cleanup: Your remaining Wizards and Royals will handle the cleanup.
3.2. Town Hall 10 & 11: The Rise of the Inferno Tower
Strategy: Hybrid (Hogs and Miners)
Army Comp: 1 Ice Golem, 5 Healers, 10 Miners, 15 Hog Riders, 5 Wizards, 5 Wall Breakers.
Spells: 3 Heal, 1 Rage, 1 Poison, 1 Freeze. Siege: Log Launcher or Wall Wrecker.
Clan Castle: Yetis or Bowlers.
The Plan:
1. Queen Charge: Start with a Queen Charge on one side of the base. Use 4-5 Healers on your Queen, supported by a few Wizards, to clear a corner. Her goal is to take out an Inferno Tower, the enemy Queen, or create a massive funnel.
2. Main Push: Send your Log Launcher (with CC troops inside) and your King/Warden into the base from the side the Queen just cleared. This forms your kill squad.
3. Hybrid Deployment: Deploy the Hog Riders and Miners together on the path just cleared by your kill squad. They will move around the base in a pack, with Miners tanking for Hogs and vice-versa. Spam Heal Spells on this group.
3.3. Town Hall 12 & 13: Mastering the Giga Inferno and Scatter Shot
Strategy: Yeti Smash
Army Comp: 3 Ice Golems, 8-10 Yetis, 5-6 Wizards, 1 Super Wall Breaker, 1-2 Headhunters (for enemy Heroes).
Spells: 1 Rage, 2 Freeze, 3-4 Rage, 1 Poison.
Siege: Log Launcher or Stone Slammer. Clan Castle: Yetis + Rage.
The Plan:
1. Blob Warfare: This is a brute-force strategy. Create a wide funnel on one side of the base with your Wizards and Heroes.
2. The Smash: Deploy all your Ice Golems and Yetis in a line, followed by your Heroes. Send the Siege Machine right up the middle. The goal is to create an unstoppable ball of destruction.
3. Spell Spam: Use Rage Spells to supercharge the blob. Use Freeze Spells to lock down the Giga Inferno, Scatter Shots, and any Single-Target Inferno Towers. The raw power of the Yetis and their Yetimites will overwhelm the base.
3.4. Town Hall 14 & 15: The RC Meta and Monolith Mayhem
Strategy: Super Archer Blimp (SAB)
Army Comp: A flexible ground or air army (e.g., Yetis, Dragons) to create a distraction. The star is your Siege Barracks or Blimp in the Clan Castle, filled with Super Archers and 1-2 headhunters.
The Plan:
1. The Distraction: Launch your main army on one side of the base to absorb fire and trigger traps.
2. The Snipe: Send the Blimp (often with Warden invisibility) or Siege Barracks to the very center of the base, ideally near the Town Hall.
3. The Grand Finale: Deploy the Invisibility Spells on your Super Archers. With their long range and chain damage, they will obliterate the core of the base—Town Hall, Scatter Shots, Monolith, and all—in a matter of seconds. This is a high-risk, high-reward strategy that can end a raid in 30 seconds.
—
Chapter 4: Advanced Tactics for the Elite Player

You’ve mastered the basics. Now, let’s refine your skills.
The Grand Warden’s Toggle:Learn when to switch your Warden from ground to air to protect a Siege Machine or key air troops.
Suicide Heroes: Sometimes, the best use for a Hero is to sacrifice them to take out a key defense or trigger a trap early.
Spell Stacking: Dropping a Rage and a Heal spell in the same spot for maximum effect on your main push.
Counting Defenses: In competitive wars, players will count how many times a defense has fired to predict where traps like Seeking Air Mines or Giant Bombs are located.
Chapter 5: Practice Makes Perfect: How to Train and Improve
You will fail. The key is to learn from it.
1. Friendly Challenges: The best way to practice. Attack your clanmates’ bases without any cost. Ask for feedback.
2. Watch Your Replays: Especially your failures. Where did the funnel break? Why did the Queen die? Was the spell too early or too late?
3. Watch Pro Players: Content creators like *Judo Sloth Gaming*, *Itzu*, and *Clash With Eric* provide incredible breakdowns of high-level attacks. Don’t just watch; analyze their decision-making process.
Conclusion: From Zero to Hero, One Attack at a Time
Winning in Clash of Clans is a journey, not a destination. It requires patience, analysis, and a willingness to learn from every single attack. There is no “I Win” button, but there is a formula: Scout -> Plan -> Funnel -> Execute.
Stop throwing your armies at the wall and hoping something sticks. Embrace the strategy. Master the funnel. Respect the spells. By internalizing the principles in this guide, you will stop being the player who gets one star and start being the player who secures the clutch three-star victory for your clan.
Now go forth, Chief. Your next triple is waiting.