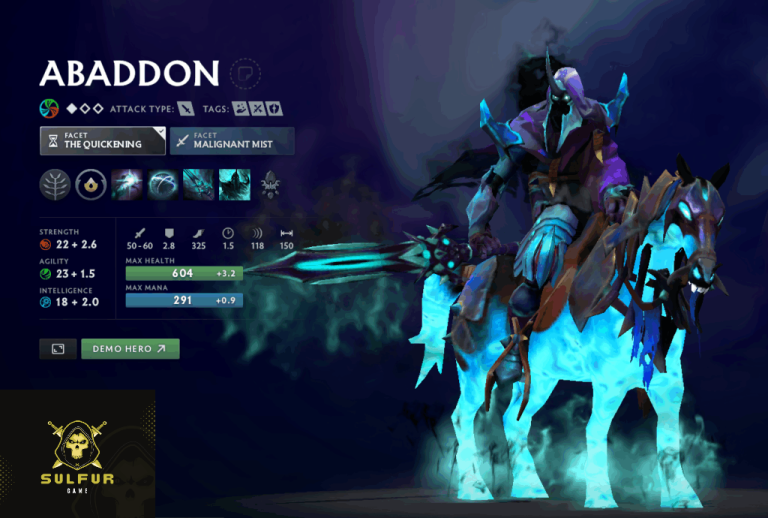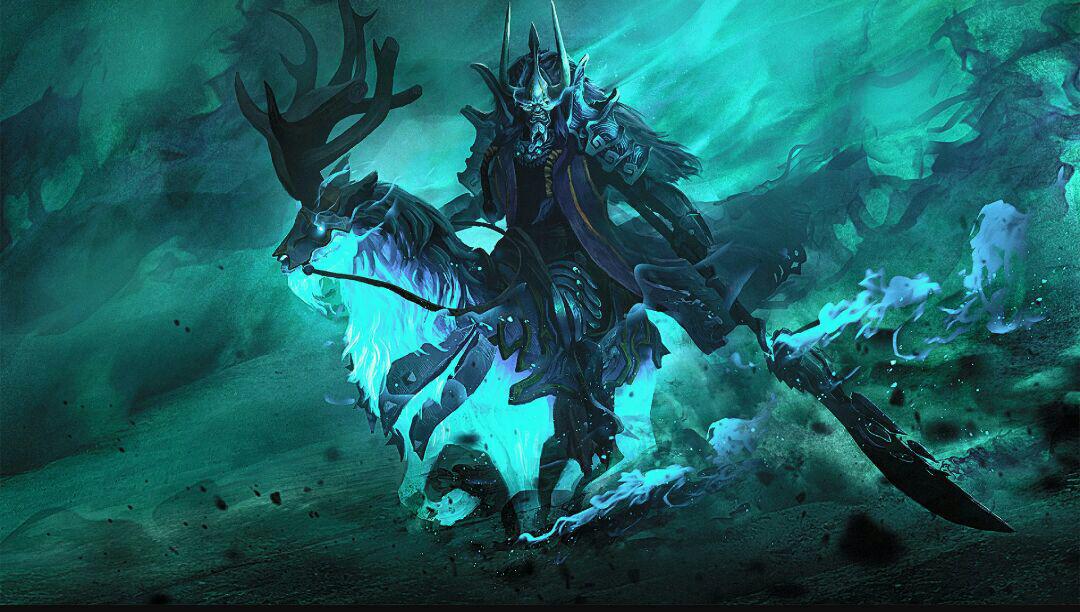
The Complete Guide to Playing Abaddon as Support in Dota 2: The Unkillable Guardian
Introduction: Rethinking Abaddon’s Role
In the ever-evolving meta of Dota 2, heroes often transcend their traditional roles to find new purpose. Abaddon, the Lord of Avernus, frequently appears as a durable offlaner or even carry, but his kit contains untapped potential for the support position. This comprehensive guide will transform your understanding of Abaddon, detailing how to master him as a position 4 or 5 support who becomes an unkillable frontline guardian for your team.
As a support, Abaddon brings unique advantages: incredible sustain for allies, powerful dispels, a surprising damage threshold that punishes enemies, and an ultimate that makes him nearly impossible to kill during teamfights. When played correctly, support Abaddon can completely disrupt enemy engagements, save cores from certain death, and create space like few other heroes can.
Why Abaddon Works as a Support
Key Strengths
-
Borrowed Time Ultimate: Makes Abaddon extremely difficult to kill, forcing enemies to either ignore him or waste significant resources
-
Aphotic Shield: Provides a powerful dispel and damage absorption for allies, countering numerous disables and nukes
-
Mist Coil: Offers burst heal/damage with low cooldown, perfect for trading in lane
-
Curse of Avernus: Provides valuable slow and attack speed buffs without requiring farm priority
-
Low Economy Dependence: Remains effective with minimal items thanks to innate durability
Team Composition Synergy
Support Abaddon excels with:
-
High-damage cores who need protection (Sniper, Drow Ranger)
-
Dive heroes who benefit from his shield (Spectre, Anti-Mage)
-
Teams lacking dispels against silences and roots
-
Lineups that want to take extended fights where his sustain shines
Skill Build and Ability Breakdown
Mist Coil (Q)
Priority for Support: Moderate
-
100/150/200/250 heal/damage for 50/60/70/80 HP cost
-
4.5-second cooldown at all levels
-
800 cast range
Support Usage:
-
Primary trading tool in laning phase
-
Last-resort healing for your carry
-
Securing ranged creeps when needed
-
Harassing enemy offlaner
-
Can deny yourself when at low HP under Borrowed Time
Aphotic Shield (W)
Priority for Support: High (Max First)
-
110/140/170/200 damage absorption
-
Dispels most debuffs on cast
-
12/10/8/6-second cooldown
-
500 cast range (800 with talent)
Support Usage:
-
Primary saving mechanism for allies
-
Countering silences, roots, and slows
-
Wave clearing when necessary
-
Setting up for Curse of Avernus attacks
-
Can be used on creeps to push lanes safely
Curse of Avernus (E)
Priority for Support: Low to Moderate (Value Point)
-
10/15/20/25 attack speed slow on enemies
-
10/20/30/40 attack speed buff for allies
-
4.5-second duration, 0.75-second slow duration per attack
-
Passive ability with 600 range
Support Usage:
-
Single value point for slow and attack speed buff
-
Chasing fleeing enemies
-
Buffing your carry’s attack speed
-
Roshan assistance
-
Consider maxing last
Borrowed Time (R)
Priority for Support: High (Take at 6, 12, 18)
-
Automatically triggers at 400 HP (when taking damage from heroes)
-
Can be manually activated
-
4/5/6 second duration
-
Redirects all incoming damage to healing
-
60/50/40-second cooldown
Support Usage:
-
Makes you nearly unkillable during engagements
-
Allows you to frontline for your team
-
Bait enemy spells and cooldowns
-
Sustain through teamfights
-
Tower dive with impunity
Recommended Support Skill Build
-
Level 1: Mist Coil (for trading)
-
Level 2: Aphotic Shield (for saving/dispel)
-
Level 3: Aphotic Shield
-
Level 4: Mist Coil
-
Level 5: Aphotic Shield
-
Level 6: Borrowed Time
-
Level 7: Aphotic Shield
-
Level 8: Mist Coil
-
Level 9: Mist Coil
-
Level 10: +30 Mist Coil Heal/Damage Talent
-
Level 11: Curse of Avernus
-
Level 12: Borrowed Time
-
Level 13: Curse of Avernus
-
Level 14: Curse of Avernus
-
Level 15: +10% Curse of Avernus Movement Slow Talent
-
Level 16: Curse of Avernus
-
Level 17: Stats
-
Level 18: Borrowed Time
19-25: Stats and Talents
Alternative Build: Against heavy dispel-needed lineups (with Silencer, Skywrath), consider maxing Shield by level 7 with only 1 point in Mist Coil.
Item Build for Support Abaddon
Starting Items (Position 5)
-
Tango
-
Healing Salve
-
Enchanted Mango
-
Clarity
-
Iron Branches (2)
-
Observer Ward or Sentry Ward
Early Game (0-10 minutes)
-
Boots of Speed: Mobility is key for positioning shields
-
Magic Wand: Stats and burst heal against spell-heavy lanes
-
Wind Lace: Additional positioning ability
-
Ring of Basilius: Optional for mana regen and armor
Core Items (10-25 minutes)
-
Tranquil Boots: Primary boot choice for sustain and movement speed
-
Soul Ring: Solves mana issues completely, synergizes with Mist Coil
-
Aether Lens: Increases cast range dramatically (upgrades from Wind Lace)
-
Magic Wand Upgrade: To Holy Locket for enhanced healing
Situational and Luxury Items
-
Force Staff/Glimmer Cape: Additional save items when needed
-
Spirit Vessel: Against heavy-healing lineups
-
Solar Crest: Buff allies, debuff enemies
-
Aghanim’s Scepter: Makes Borrowed Time affect nearby allies (game-changing in some games)
-
Guardian Greaves: Teamfight sustain when ahead
-
Lotus Orb: Additional dispels against heavy debuff teams
-
Heaven’s Halberd: Against right-click heavy lineups
Laning Phase as Support Abaddon
Position 5 (Safe Lane Support)
Strong Lane Partners:
-
Juggernaut (spin + shield combo)
-
Ursa (allows aggressive positioning)
-
Troll Warlord (synergy with attack speed buff)
-
Any fragile carry who needs protection
Laning Strategy:
-
Level 1: Use Mist Coil to harass enemy offlaner. The 250 damage nuke is significant at level 1.
-
Trading: You can afford to take bad trades since you can heal yourself with Mist Coil. Force the enemy to use their regen.
-
Shield Usage: Use Aphotic Shield primarily to dispel debuffs from your carry (roots, slows, poison attacks). The damage absorption is secondary.
-
Pull Creeps: Standard pulling to maintain lane equilibrium.
-
Harassment: Right-click enemies between shield and coil cooldowns. You’re surprisingly durable.
-
Mana Management: Without Soul Ring, be conservative with Mist Coil. Focus on shield usage.
Position 4 (Offlane Support)
Strong Lane Partners:
-
Legion Commander
-
Centaur Warrunner
-
Slardar
-
Any offlaner who wants to be aggressive
Laning Strategy:
-
Aggression: You can play very aggressively with your offlaner. Shield allows diving and tower harassment.
-
Kill Potential: Mist Coil damage combined with your offlaner’s damage often secures kills.
-
Harass Enemy Carry: Force the enemy carry to use regen and miss last hits.
-
Pull Hard Camp: Disrupt the enemy safelaner’s farm.
Against Different Lane Matchups
Easy Matchups:
-
Melee cores without burst damage
-
Weak defensive supports
-
Low-damage lanes
Difficult Matchups:
-
High burst damage (Skywrath Mage)
-
Multiple dispel needs (Silencer + something else)
-
Lane dominators (Undying)
Mid-Game Transition (10-25 minutes)
Warding and Vision
As support Abaddon, your durability allows you to ward dangerous areas:
-
Use Borrowed Time to escape when caught while warding
-
Deward aggressively since you can survive ganks
-
Place offensive wards for taking enemy towers
Objective Taking
-
Your shield helps push waves safely
-
You can tank tower hits with Borrowed Time
-
Roshan attempts are easier with your attack speed buff
Teamfight Positioning
-
Frontline: Stand slightly ahead of your cores to absorb initial spells
-
Reactive Saving: Stay close enough to shield allies but not so close you all get caught in AoE
-
Ultimate Timing: Don’t pop Borrowed Time too early. Wait for enemies to commit spells.
Communication
-
Tell allies when you have shield ready for dispel
-
Coordinate dives with Borrowed Time availability
-
Call for retreats when your spells are on cooldown
Late Game Role (25+ minutes)
Teamfight Execution
-
Initiation: You’re not an initiator, but you can follow up after initiation
-
Spell Absorption: Use your body to absorb key spells with Borrowed Time
-
Dispel Priority: Shield the most important disabled ally (usually your carry or mid)
-
Sustained Healing: Use Mist Coil on low allies during fights
-
Chase/Disengage: Use Curse of Avernus to slow fleeing enemies or help your team retreat
Item Usage
-
Use active items (Force Staff, Glimmer) to save allies
-
Aghanim’s Scepter can turn fights if you get it
-
Positioning items become crucial
High Ground Siege
-
You can tank tower and defensive spells with Borrowed Time
-
Shield allies trying to hit buildings
-
Use Mist Coil to sustain sieging allies
Advanced Techniques and Tips
Aphotic Shield Advanced Usage
-
The shield explosion damages enemies in 675 radius—use it for wave clear
-
Can be used on creeps to push lanes from safety
-
Instant dispel—practice reaction times for silencing spells
-
Blocks damage from Doom’s ultimate if applied before damage instances
Borrowed Time Tricks
-
Manually activate just before big nukes (Lina Laguna, Lion Finger)
-
Use to purge certain debuffs (Orchid, Venomancer Gale, etc.)
-
Bait enemies by walking at low HP, then activating
-
Can TP out while active if enemies have no stuns
Mist Coil Efficiency
-
Use Soul Ring before casting to offset HP cost
-
Deny yourself to prevent gold/XP when certain to die
-
Last hit ranged creeps when carry can’t
-
Pre-cast on allies before taking damage (like before Roshan attacks)
Curse of Avernus Applications
-
Apply to enemy before they TP to cancel it
-
Buff your carry during Roshan or tower pushes
-
Slow multiple enemies in fights by attacking different targets
Talent Choices Analysis
Level 10: +30 Mist Coil Heal/Damage vs +8 Strength</strong>
-
Almost always take the Mist Coil talent for better sustain and harassment
Level 15: +10% Curse of Avernus Movement Slow vs +25 Movement Speed</strong>
-
The slow is generally better for control, but movement speed can be valuable if you need positioning
Level 20: +350 Aphotic Shield Health vs +400 Mist Coil Cast Range</strong>
-
Shield health is usually better for saving allies, but cast range can be situationally useful
Level 25: +1.5s Borrowed Time Duration vs Curse of Avernus is Applied on Attack</strong>
-
Borrowed Time duration is typically better for teamfights, but the Avernus talent can be game-changing against certain lineups
Countering and Countered By
Heroes Abaddon Counters
-
Silencer: Shield dispels Global Silence and Last Word
-
Bane: Can shield allies out of Fiend’s Grip
-
Shadow Shaman: Shield removes Shackles
-
Doom: Can shield before Doom damage ticks (but not the initial mute)
-
Any hero reliant on single-target disables
Counters to Abaddon
-
Ancient Apparition: Ice Blast prevents healing during Borrowed Time
-
Axe: Culling Blade goes through Borrowed Time if threshold is met
-
Necrophos: Heartstopper Aura and Reaper’s Scythe are problematic
-
Invoker: Ice Wall and Tornado can control you during ultimate
-
Heroes with instant disables that prevent manual ultimate activation
Item Counters
-
Spirit Vessel: Reduces healing during Borrowed Time
-
Skull Basher/Abyssal Blade: Can stun preventing manual ultimate
-
Heaven’s Halberd: Disarms you so you can’t apply Curse of Avernus
Gameplay Examples and Scenarios
Scenario 1: Defending Against Gank
Your carry is farming jungle when two enemies appear. Your actions:
-
Immediately cast Aphotic Shield on carry to dispel any initial disable
-
Mist Coil the lowest HP enemy or your carry depending on situation
-
Body block for your carry
-
Activate Borrowed Time when low to draw attention
-
Continue shielding and healing while retreating
Scenario 2: High Ground Siege
Your team wants to take enemy T3 tower:
-
Use shield on creep wave to push it into tower
-
Stand in front with Borrowed Time ready to absorb spells
-
Mist Coil allies taking tower damage
-
Apply Curse of Avernus to enemy defenders who approach
-
Use shield to dispel any disables on your damage dealers
Scenario 3: Roshan Contest
Enemy team approaches while you’re taking Roshan:
-
Shield your main Roshan hitter
-
Save Borrowed Time for when enemies engage
-
Use Mist Coil to secure Roshan if necessary
-
Apply Curse of Avernus to enemies to slow their approach
-
Tank damage with Borrowed Time while team finishes Roshan
Common Mistakes to Avoid
-
Using Aphotic Shield Too Early: Wait for actual debuffs instead of pre-emptively shielding
-
Wasting Borrowed Time: Don’t activate manually at high HP unless to purge specific debuffs
-
Overestimating Tankiness: Without Borrowed Time, you’re not that durable
-
Ignoring Mana Issues: Get Soul Ring or sufficient regen to cast spells consistently
-
Poor Positioning: You need to be close enough to shield allies but not so close you eat unnecessary damage
-
Maxing Wrong Skills: Don’t max Curse of Avernus early as support
-
Forgetting to Right-Click: Your attacks still matter, especially with Curse of Avernus
Conclusion: Mastering the Unkillable Support
Support Abaddon represents one of the most resilient and disruptive heroes in the position 4 or 5 role. His unique combination of dispels, healing, damage, and near-immortality during teamfights makes him a versatile pick who can adapt to numerous situations. While he may lack the flashy playmaking of some supports, his consistent value throughout all game stages makes him a reliable choice.
The key to success with support Abaddon lies in perfecting your Aphotic Shield timing, managing your ultimate effectively, and understanding your role as a frontline protector rather than a backline caster. With practice, you’ll become the backbone your team needs—the unkillable guardian who turns lost fights into victories and protects your cores through even the most dire engagements.
Remember that Dota 2 is constantly evolving, and flexibility is crucial. Adapt your item builds and skill usage to each specific game, and you’ll find Abaddon to be one of the most rewarding support heroes in the game.
Frequently Asked Questions (FAQ)
Q: Is Abaddon really viable as a support in high-level play?
A: Yes, while not a top-tier meta pick, Abaddon has been played as support in professional games. His effectiveness depends on team composition and enemy picks. He excels against lineups with key single-target disables that Aphotic Shield can dispel.
Q: Should I always max Aphotic Shield first?
A: In 90% of games, yes. The reduced cooldown and increased absorb are too valuable. Only consider maxing Mist Coil first if you’re in an extremely aggressive kill lane where the extra damage will secure kills.
Q: What’s the most important timing for support Abaddon?
A: Level 6 is crucial because Borrowed Time allows you to play aggressively. The next important timing is Soul Ring completion, which solves your mana issues. Aether Lens at around 20-25 minutes significantly improves your positioning safety.
Q: How do I deal with Ancient Apparition or Axe counters?
A: Against AA, stay farther back in fights and avoid being hit by Ice Blast. Use Shield purely for dispels rather than damage absorption. Against Axe, never let your HP drop near Culling Blade threshold during fights, and manually activate Borrowed Time before he can dunk you.
Q: When should I get Aghanim’s Scepter on support Abaddon?
A: Aghs is a luxury item, but consider it when: 1) Your team groups constantly, 2) Enemy has AoE damage that affects your whole team, 3) You’re ahead and can afford the 4200 gold, 4) Your cores are vulnerable to burst damage.
Q: Should I use Borrowed Time manually or let it auto-cast?
A: Generally, let it auto-cast in teamfights. Manual activation is for: 1) Purging specific debuffs (Orchid, Silence), 2) When you need healing but aren’t being focused, 3) Baiting enemies by activating at higher HP.
Q: How do I lane against strong dispel needs (like Silencer + another hero)?
A: In these difficult lanes, prioritize getting levels for lower Shield cooldown. Consider an early Magic Stick/Wand. Communicate with your carry to play safer. Sometimes it’s better to abandon the lane and help elsewhere if it’s truly unwinnable.
Q: What’s the best way to use Aphotic Shield in teamfights?
A: Prioritize: 1) Allies under disabling effects, 2) Allies taking burst damage, 3) Yourself to dispel disables if you need to cast spells, 4) Any ally to add damage absorption. The dispel is often more valuable than the shield itself.
Q: Can support Abaddon transition to a core role if needed?
A: While not ideal, Abaddon can farm moderately well with Shield. If your game goes very late and you get items, you can become semi-core, but don’t steal farm from your actual cores. Your primary role remains support.
Q: Which neutral items are best on support Abaddon?
A: Tier 1: Trusty Shovel or Ocean Heart. Tier 2: Philosopher’s Stone or Grove Bow. Tier 3: Titan Sliver or Paladin Sword. Tier 4: Trickster Cloak or Minotaur Horn. Tier 5: Mirror Shield or Seer Stone. Prioritize items that provide survivability or utility.
Q: How do I itemize against heavy magic damage vs physical damage?
A: Against magic: early Hood into Pipe if no one else is building it. Against physical: Medallion into Solar Crest or early Plate Mail. Your default build (Tranquils, Soul Ring, Aether) works against mixed damage.
Q: Is Holy Locket worth it on Abaddon?
A: Yes, especially if you have the Mist Coil talent. The amplified healing combined with your other healing items makes you a potent sustain machine. Build it from Magic Wand which you already want.
Q: Should I ever skip Curse of Avernus entirely for stats?
A: One value point is almost always worth it for the slow and attack speed buff. The slow can secure kills, and the buff helps with Roshan and towers. Only skip if you desperately need the stats to survive.
Q: How do I play from behind as support Abaddon?
A: Focus on defensive positioning. Use Shield primarily to save allies. Ward defensively. Use Borrowed Time to bait enemies into bad fights under your towers. Look for pickoffs with Mist Coil + Shield burst damage.
Q: What’s the best way to use Mist Coil in lane?
A: Use it to harass enemies when they go for last hits. The 250 damage at level 1 is significant. Be mindful of your HP cost—don’t coil if it puts you in kill range. Use it to secure range creeps if your carry can’t get them.
Q: How do I improve my Aphotic Shield reaction time?
A: Practice anticipating enemy disables. Watch for animation cues. Position yourself so you’re always in range to shield key allies. Use quick cast if you don’t already. The more you play Abaddon, the more intuitive it becomes.