Become a devastating force of nature with our comprehensive guide to Luna, the Moon Rider, covering everything from early-game farming to late-game domination.
Luna tips and tricks Dota 2: Harnessing the Power of the Moon
Luna, the Moon Rider, stands as one of Dota 2‘s most iconic carry heroes—a glass cannon capable of astronomical damage output when properly piloted. With her signature Moon Glaives bouncing between enemies and her game-changing Eclipse ultimate, Luna can transition from a vulnerable early-game farmer to the centerpiece of a teamfight in mere seconds. This guide will illuminate the path to mastering this radiant carry, offering professional tips, strategic insights, and answers to common questions that plague aspiring Moon Riders.
Understanding Luna’s Kit: A Celestial Arsenal
Lucent Beam (Q)
Luna’s targeted nuke and mini-stun serves multiple purposes throughout the game. In the laning phase, it provides harassment and last-hit security. At level 4, it deals 300 magic damage with a 0.6-second stun—valuable for interrupting channeling abilities or securing kills. Many players underestimate its early-game trading potential, especially when combined with right-clicks during the stun duration.
Advanced Tip: The cast point on Lucent Beam is surprisingly quick (0.3 seconds). Use this to your advantage when trying to cancel TP scrolls or interrupt key abilities like Witch Doctor’s Death Ward or Crystal Maiden’s Freezing Field.
Moon Glaives (W)
The cornerstone of Luna’s farming and teamfight damage. Each glaive bounce deals reduced damage (35%/40%/45%/50% per bounce) but can hit unlimited enemies within their bounce radius (500). This ability transforms Luna into one of Dota’s fastest farmers once she acquires some damage items.
Critical Insight: Moon Glaives benefit from attack modifiers and critical strikes on the primary target only. However, the bounced damage calculation is based on the damage dealt to the previous target, including critical strikes. This means a crit on your first attack can lead to devastating bounce damage.
Lunar Blessing (E)
A passive aura that provides bonus damage to Luna and nearby allies (14/22/30/38). Additionally, it grants Luna herself 10/20/30/40 night vision bonus—one of her most underrated attributes. This extra vision during night time significantly improves her safety when farming jungle camps or pushing lanes in darkness.
Strategic Note: The aura range is 1200, similar to many popular auras like Vladimir’s Offering. Position yourself to maximize value for your team during engagements and pushes.
Eclipse (R)
Luna’s signature ultimate summons beams of lunar energy that strike random enemies within a 675 radius. Each beam deals the current level of Lucent Beam damage (without the stun). At level 3, Eclipse fires 12 beams over 5.4 seconds—potentially dealing 3600 magic damage to a single target if they’re unlucky enough to be the only enemy in range.
Game-Changing Fact: Eclipse beams prioritize heroes but can hit creeps if no heroes are available. Aghanim’s Shard upgrades Eclipse to be centered on Luna rather than a target location, while Aghanim’s Scepter reduces cooldown to 60 seconds and causes beams to apply a 100% move and attack slow for 1 second.
Skill Build: Adapting to the Battlefield
Standard Safe Lane Build
-
Level 1: Lunar Blessing (E) – The damage bonus helps secure last hits and harass
-
Level 2: Lucent Beam (Q) – Adds kill threat and harassment
-
Level 3: Moon Glaives (W) – Begin accelerating farm
-
Level 4: Lunar Blessing (E)
-
Level 5: Lunar Blessing (E)
-
Level 6: Eclipse (R)
-
Level 7: Lunar Blessing (E) – Max aura first for maximum damage
-
Level 8: Moon Glaives (W)
-
Level 9: Moon Glaives (W)
-
Level 10: Talent (Usually +6 Stats)
-
Level 11: Moon Glaives (W)
-
Level 12: Lucent Beam (Q)
-
Level 13: Lucent Beam (Q)
-
Level 14: Lucent Beam (Q)
-
Level 15: Talent (+15% Lifesteal)
-
Level 16: Stats
-
Level 18: Eclipse (R)
18-25: Max stats and remaining abilities
Situational Variations
-
Against weak lanes: Consider an earlier point in Moon Glaives (level 2 or 3) to begin pushing the wave and jungling sooner
-
Kill-oriented lanes: If paired with strong disable supports (like Shadow Shaman or Bane), prioritize Lucent Beam for added burst
-
Extremely difficult lanes: Sometimes a second early point in Lunar Blessing can help you secure last hits from greater distance
Item Build: Gearing Your Moon Rider
Starting Items (Safe Lane)
-
Tango
-
Quelling Blade
-
Circlet
-
Gauntlets of Strength
-
Iron Branch (or two)
-
Alternative: Magic Stick against spammy opponents (Bristleback, Batrider)
Early Game (0-10 minutes)
-
Magic Wand: Essential against ability-spam opponents
-
Power Treads: The attack speed synergizes perfectly with your damage aura and farming style
-
Wraith Band (or two): Cost-effective stats that smooth your early game
-
Mask of Madness (optional): Some players prefer this farming accelerator, though it leaves you vulnerable
Core Items (10-25 minutes)
-
Dragon Lance: The undisputed first major item for Luna. The increased range (from 330 to 420) dramatically improves your safety and positioning in fights while providing excellent stats.
-
Manta Style: Luna’s most important core item after Dragon Lance. The illusions benefit from Lunar Blessing and Moon Glaives, making them exceptional for pushing and farming. The dispel is invaluable against silences and slows.
-
Black King Bar: Almost always necessary. Luna’s biggest weakness is being disabled or burst during her relatively low health pool phase.
Situational Extensions
-
Butterfly: Against physical damage lineups, the evasion and attack speed make you incredibly tanky
-
Satanic: Provides sustain and a lifesaving active when you’re focused
-
Skadi: Excellent for kiting and tanking up against mobile heroes
-
Hurricane Pike: Upgrade from Dragon Lance when you need extra mobility against gap-closing heroes (Slark, Ursa)
-
Aghanim’s Scepter: When your team needs the Eclipse slow and reduced cooldown for frequent fights
-
Moon Shard: Consumable attack speed for lategame scaling
-
Divine Rapier: The ultimate high-risk, high-reward item when you’re far behind or need to close a game immediately
Luxury Items
-
Bloodthorn: Against elusive heroes with evasion or high mobility
-
Daedalus: For massive critical strikes that amplify your glaive bounces
-
Swift Blink: For positioning and burst damage
-
Aghanim’s Shard: Provides Eclipse mobility and farming acceleration
Game Phases: From Laning to Victory
Early Game (Minutes 0-10): Survival and Farming
Luna’s laning phase is deceptively difficult despite her damage aura. With one of the lowest base health pools among carries (480 at level 1) and short attack range (330), positioning is paramount.
Laning Tips:
-
Use the high ground vision to harass enemies when they approach for last hits
-
Don’t be afraid to use Lucent Beam to secure ranged creeps if contested
-
Against dual offlanes, prioritize staying alive over getting every last hit
-
Pull the small camp if your support isn’t doing it to reset equilibrium
-
If the lane becomes unsafe, you can jungle ancient camps earlier than most heroes with proper kiting and Glaives
Mid Game (Minutes 10-25): Accelerating Farm and Objective Taking
Once you have Dragon Lance and level 4 Moon Glaives, your farming speed should skyrocket. Your priorities shift to:
-
Efficient farming patterns: Clear wave → clear nearby jungle camps → repeat
-
Joining favorable fights: Luna with Eclipse and a few items can turn early skirmishes
-
Taking objectives: Luna melts towers with her aura and glaives. After winning a fight, immediately push the nearest tower
-
Roshan control: With Helm of the Dominator or Satanic, Luna can solo Roshan relatively early
Critical Timing: Most Luna games aim to have Manta Style and BKB around 20-25 minutes. This is your first major power spike where you can confidently take teamfights.
Late Game (25+ minutes): Carrying Your Team to Victory
With 3-4 major items, Luna becomes one of the hardest-hitting carries in Dota. Your focus should be:
-
Positioning: Stay at the edge of fights, using your range to hit priority targets
-
Target selection: Don’t necessarily go for the backline—hit whoever is closest while staying safe
-
High ground siege: Your glaives bounce to buildings, making you exceptional at breaking base
-
Buyback management: As the primary carry, your buyback status dictates whether your team can take fights
Advanced Techniques and Micro-Optimizations
Eclipse Mastery
-
Vision control: Eclipse requires vision of enemies to hit them. Use observer wards, scan, or allied abilities to ensure you’re not wasting your ultimate
-
BKB timing: Cast Eclipse, then immediately activate BKB to prevent interruption
-
Blink + Eclipse combo: With Aghanim’s Shard, you can Blink into the middle of the enemy team and immediately cast Eclipse for maximum impact
-
Creep manipulation: Before a big fight, try to clear nearby enemy creeps to increase the chance Eclipse beams hit heroes
Glaive Optimization
-
Stack clearing: Luna is one of the best stack clearers in Dota. Always ask your supports to stack ancients and hard camps
-
Wave cutting: Use glaives to quickly cut waves behind enemy towers when split pushing
-
Illusion micro: Manta Style illusions last 20 seconds. Send them to push dangerous lanes while you farm safely
-
Ancients farming: With just a Morbid Mask and level 4 Glaives, you can farm ancient stacks by kiting properly
Positioning Perfection
-
Attack move: Use attack-move commands to ensure you’re always attacking while repositioning
-
Fog abuse: Your increased night vision gives you advantage in darkness. Fight during night time when possible
-
High ground defense: When defending high ground, let glaives bounce between enemy heroes and creeps for maximum damage output
Countering and Being Countered
Heroes Luna Counters
-
Melee carries with no gap close: Luna can kite them easily with her range and movement speed
-
Low-mobility intelligence heroes: They melt under Eclipse and right-clicks
-
Illusion heroes: Glaives deal with illusions efficiently (except Chaos Knight due to high magic resistance)
-
Pushers: Luna defends towers exceptionally well with her wave clear
Luna’s Counters and How to Handle Them
-
Templar Assassin: Refraction blocks your glaives and Eclipse beams. Build MKB early and avoid fighting until you can break her refraction quickly.
-
Pudge: Dismember interrupts Eclipse and he’s too tanky to burst. Position carefully and save BKB for his disables.
-
Anti-Mage: Mana Burn hurts, and he can blink away from Eclipse. Consider building Skadi to slow him and fight with allies who can lock him down.
-
Spectre: Dispersion makes you kill yourself. Build Satanic for sustain and focus other targets in fights.
-
Axe: Berserker’s Call ruins your day. Wait for his call before committing to fights or building Linken’s Sphere.
-
Heroes with instant disables (Shadow Shaman, Lion): BKB is mandatory against these heroes. Consider Linken’s Sphere as an additional layer of protection.
Talent Tree Analysis
Level 10: +6 Stats vs +20 Movement Speed
-
*+6 Stats* is generally better for farming efficiency and survivability
-
*+20 Movement Speed* can be situationally valuable against kite-heavy lineups
Level 15: +15% Lifesteal vs +100 Lucent Beam Damage
-
*+15% Lifesteal* is the standard choice, synergizing with your high damage output
-
*+100 Lucent Beam Damage* can be considered against low-health lineups or if you’re building Aghanim’s Scepter
Level 20: +1s Eclipse Beam Interval vs +10 All Stats
-
*+1s Eclipse Beam Interval* extends Eclipse duration to 6.4 seconds (14 beams total)—excellent for prolonged fights
-
*+10 All Stats* provides well-rounded benefits; choose this if you need to be tankier
Level 25: -4s Lucent Beam Cooldown vs +10% Moon Glaive Damage
-
*-4s Lucent Beam Cooldown* (to 2 seconds) effectively gives you a permanent ministun and significant magic damage
-
*+10% Moon Glaive Damage* is typically better for lategame scaling and building damage
Professional Insights and Meta Analysis
Recent professional play has seen Luna excel in lineups that can protect her early game and accelerate her farm. Teams often pair her with:
-
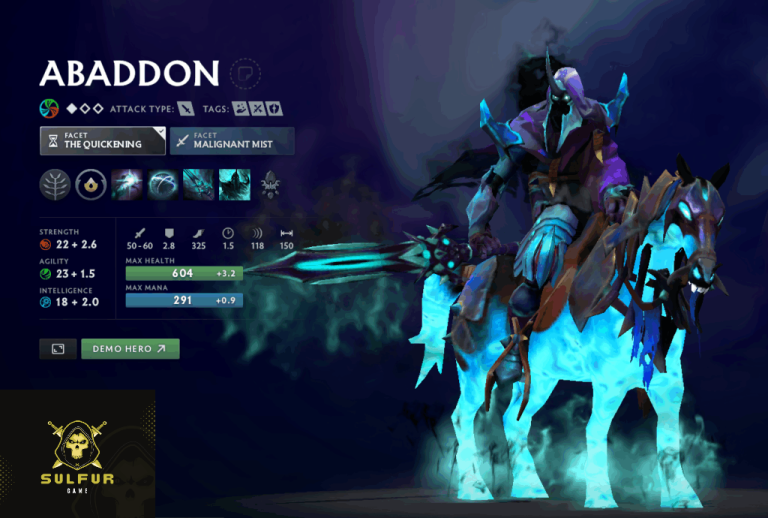
Save supports: Dazzle, Oracle, or Abaddon to ensure she survives the laning phase
-
Teamfight ultimates: Magnus, Enigma, or Tidehunter to set up perfect Eclipse opportunities
-
Push strategies: Death Prophet, Leshrac, or Lycan to capitalize on her tower demolition capabilities
The current meta favors Luna in games where she can safely reach her 2-3 item timing and end before enemy carries outscale her. Her ability to farm ancient stacks makes her particularly strong when teams are willing to stack for her.
Common Mistakes to Avoid
-
Using Eclipse without setup: Throwing Eclipse randomly rarely yields value. Wait for lockdown or cluster of enemies.
-
Overestimating survivability: Luna is deceptively squishy even with items. Never be the first to engage.
-
Poor BKB usage: Don’t pop BKB preemptively. Wait for actual threats to use their disables.
-
Farming inefficiently: Luna must leverage her glaives to farm multiple camps simultaneously. Practice optimal jungle routes.
-
Ignoring the map: Your low health makes you vulnerable to ganks. Always check minimap before pushing waves.
-
Building the same items every game: Adapt your build to the enemy lineup. Butterfly does nothing against magic damage.
Practice Regimen
To master Luna, focus on:
-
Last hitting: Practice getting 60+ last hits in 10 minutes against passive bots
-
Stack farming: Custom games practicing ancient stack clearing with minimal items
-
Eclipse positioning: Use demo mode to experiment with different Eclipse placements
-
Illusion micro: Control groups for Manta illusions to split push efficiently
-
Item timing benchmarks: Aim for consistent 15-minute Dragon Lance, 20-minute Manta, 23-minute BKB in normal games
Frequently Asked Questions (FAQ)
Q: What is Luna’s most important power spike?
A: Luna has several key spikes: Level 4 Moon Glaives for farming acceleration, Level 6 Eclipse for kill potential, and the Dragon Lance + Manta + BKB timing (usually 20-25 minutes) where she can take teamfights confidently.
Q: When should I skip BKB on Luna?
A: Almost never. There are extremely rare games against all-physical damage lineups with minimal disables where you might prioritize Butterfly first, but 95% of games require BKB as your second or third major item.
Q: How do I deal with counters like TA or Anti-Mage?
A: Against TA, build MKB early to break Refraction. Against Anti-Mage, consider Skadi to slow him and fight with teammates who can lock him down. In both cases, your goal is to outfarm them and end before they become unstoppable.
Q: Is Aghanim’s Scepter good on Luna?
A: Situationally excellent. The reduced cooldown (60 seconds) and 100% slow make it valuable against mobile lineups or when your team wants to fight frequently. It’s typically purchased after core items like Manta and BKB.
Q: Why do pros sometimes max Lucent Beam first?
A: This aggressive build (4-1-1-1 by level 7) sacrifices farming speed for lane dominance and kill potential. It’s used when paired with aggressive supports or against weak offlaners you can pressure out of lane completely.
Q: How do I farm ancient stacks efficiently?
A: With Morbid Mask and level 4 Glaives, attack the camp from maximum range and kite backwards. Against ancient dragons, focus the Black Dragons first as they have the highest damage. Always carry a TP to escape if the enemy tries to gank you.
Q: What’s the best neutral item for Luna?
A: Tier 1: Trusty Shovel (for sustain) or Possessed Mask. Tier 2: Grove Bow or Ring of Aquila. Tier 3: Paladin Sword or Elven Tunic. Tier 4: Ninja Gear or Timeless Relic. Tier 5: Mirror Shield or Apex.
Q: When should I buy Satanic vs Skadi?
A: Satanic when you need burst survivability and lifesteal (against burst damage). Skadi when you need to kite or be tankier (against mobile heroes like Slark or Ursa). You can eventually build both in ultra-late game scenarios.
Q: How do I position in teamfights?
A: Stay at the edge, hitting the closest enemy while staying safe. Use trees and high ground for vision advantage. Never initiate unless you have Aghanim’s Shard and BKB ready. Let your team engage first, then clean up.
Q: Is Luna good against illusion heroes?
A: Generally yes, as Moon Glaives clear illusions efficiently. The exception is Chaos Knight, whose illusions have high magic resistance, making them resilient to Eclipse and more difficult to clear with glaives.
Conclusion: Ascend to Lunar Greatness
Luna represents the quintessential Dota 2 carry—fragile early but overwhelmingly powerful with farm. Mastering her requires understanding not just her mechanics but the rhythm of a carry’s game: when to farm, when to fight, and how to accelerate your timings. With practice, your Luna games will shine with the brilliance of a full moon, illuminating the path to victory through devastating teamfight impact and relentless objective pressure.
Remember the core philosophy: survive the night, and you’ll dominate the dawn. Your glaives will carve through enemies, your Eclipse will turn battles, and your leadership will guide your team to victory. Now take these insights to the battlefield, and may the moon’s blessings be upon your matches.
This guide is based on the current Dota 2 meta as of 2023. Item builds and strategies may evolve with game patches, so always adapt to the changing landscape of competitive play.