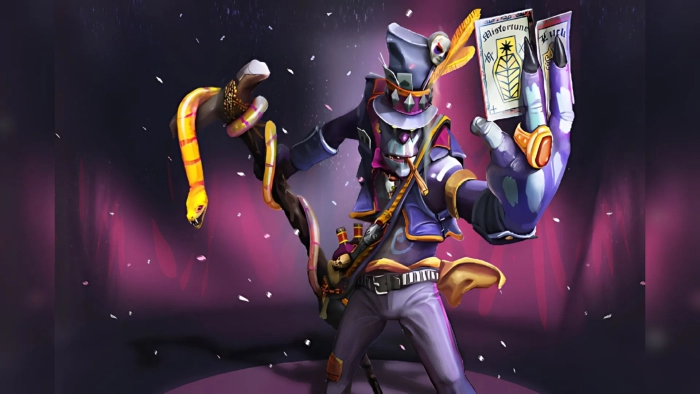
Witch Doctor tips and tricks: Unleashing the Power of Voodoo
Witch Doctor, the charismatic healer and chaos-bringer of Dota 2, stands as one of the game’s most versatile and impactful support heroes. With his unique blend of healing, crowd control, and explosive area damage, he can single-handedly swing team fights and dictate the pace of the game. Yet, despite his seemingly straightforward kit, mastering Witch Doctor requires nuanced understanding, precise timing, and strategic creativity. This comprehensive guide delves deep into the voodoo arts, providing advanced tips, tricks, and insights to transform you from a casual practitioner into a feared maestro of malediction.
Whether you’re a seasoned support player looking to refine your craft or a core player seeking to understand the hero’s potential, this guide will equip you with the knowledge to dominate the battlefield.
Part 1: Understanding the Core – Skills Breakdown & Synergy
Witch Doctor’s power lies in the synergistic potential of his four abilities. Mastering their individual nuances and combined usage is the first step to success.
1. Paralyzing Cask (Q)
-
Mechanics: The cask bounces between units, prioritizing heroes. Each bounce applies a stun that increases in duration (from 0.5s to 1.5s).
-
Pro Tips:
-
Lane Domination: In the laning stage, try to cast Cask when only one enemy hero is near a single creep. This ensures maximum bounces and stun duration on the hero.
-
Wave Control: Use Cask on a solo ranged creep to push the wave quickly or to secure last hits from a distance in dangerous situations.
-
Canceling Channels: The ministun on the first bounce is perfect for interrupting teleport scrolls, channeling spells like Crystal Maiden’s Freezing Field, or enemy Town Portal Scrolls.
-
Vision Trick: Cask provides brief flying vision around each bounce. Use it to check uphill cliffs or Roshan pit without face-checking.
-
2. Voodoo Restoration (W)
-
Mechanics: A toggleable, mana-draining area heal that affects Witch Doctor and all nearby allies.
-
Pro Tips:
-
Efficiency is Key: Don’t leave it on constantly in the laning phase. Toggle it in short bursts to top up your carry’s health while conserving your precious mana pool for Cask and Maledict.
-
Sustaining Pushes: Keep it active during tower sieges to negate enemy poke damage and sustain your creep wave. It makes your push incredibly resilient.
-
Baiting Tool: A low-health Witch Doctor with Restoration active can bait over-eager enemies into dangerous dives, only to be met with a Cask and follow-up from teammates.
-
Mana Management: Pair this skill with mana-regeneration items like Sage’s Mask, Magic Wand, or Arcane Boots early on.
-
3. Maledict (E) – The Art of Execution
-
Mechanics: Places a curse on enemies in an area. Any damage they take causes bursts of damage based on lost health.
-
Advanced Mastery:
-
The Combo: The classic and most devastating combo is Cask -> Maledict -> Death Ward. The Cask holds them in place for a perfect Maledict application, and the subsequent Death Ward damage triggers multiple Maledict bursts, often leading to instant kills.
-
Vision & Casting: Maledict has a slight delay. Use it to predict enemy movement or cast it immediately after a successful Cask. Remember, it requires vision, so dust or sentries are crucial against invisible heroes.
-
Pure Killing Power: This spell devastates high-health strength heroes. A level 4 Maledict can deal over 500+ magic damage to a hero who loses 50% of their HP while cursed.
-
Item Synergy: Maledict damage is triggered by any damage source. This includes items like Urn of Shadows, Spirit Vessel, and even Radiance.
-
4. Death Ward (R) – Channeled Catastrophe
-
Mechanics: Witch Doctor channels a powerful ward that attacks the nearest enemy hero at rapid speed. It applies attack modifiers and can be devastating with proper positioning.
-
Ultimate-Level Tricks:
-
Positioning is Everything: Your #1 priority. Channel from fog of war, behind trees, on cliffs, or while hidden by a Smoke of Deceit or Glimmer Cape. A dead Witch Doctor deals no damage.
-
Target Prioritization: The ward attacks the closest hero. Use this to your advantage by positioning so it hits the desired target. You can also use Force Staff to reposition enemies into the ward’s range or pathing.
-
Combining with Disables: Death Ward’s power multiplies when enemies cannot move or attack you. Coordinate with allies who have big area disables like Faceless Void’s Chronosphere, Magnus’s Reverse Polarity, or Enigma’s Black Hole.
-
The Aghanim’s Scepter Power Spike: This upgrade is game-changing. It adds two bounces, making it an unparalleled teamfight weapon. In chaotic fights, it can wipe entire teams.
-
Part 2: Itemization – Building for Impact
Witch Doctor’s item build is highly adaptable, responding to the needs of the game.
Core Early Game:
-
Tranquil Boots: The standard choice. Provides much-needed armor, movement speed, and HP regeneration, synergizing with his roaming and sustain role.
-
Magic Wand: A must-have for the stats and burst heal/mana.
-
Urn of Shadows / Spirit Vessel: Excellent choices. Provides mana regen, strength, and an active that synergizes perfectly with Maledict. Upgrade to Spirit Vessel against high-regeneration heroes (Morphling, Alchemist, Huskar).
Essential Mid-Game Utility:
-
Glimmer Cape: The premier defensive item. Use it to save allies, or more importantly, to cast on yourself before channeling Death Ward for invisibility and magic resistance.
-
Force Staff: For repositioning, saving allies, escaping, or pushing enemies into your Maledict/Death Ward.
-
Aghanim’s Scepter: The core damage item. Transforms your ultimate from a single-target delete button to a team-wiping phenomenon.
Situational & Luxury Picks:
-
Aether Lens: Increases cast range for safer Cask initiations and Maledict applications.
-
Blink Dagger: For aggressive, initiation-focused play. Blink in, Cask, Maledict, Death Ward.
-
Ghost Scepter: Against heavy physical damage line-ups (Ursa, Troll Warlord).
-
Octarine Core: Reduces cooldowns significantly (Death Ward down to 60s) and provides spell lifesteal from all your abilities, including Death Ward hits.
-
Refresher Orb: Double Death Ward in a late-game team fight is almost always a victory.
Part 3: Gameplay Phases – From Laning to Late Game
Laning Stage (Minutes 0-10):
-
Role: As position 4 or 5, your job is to secure your carry’s farm and harass the enemy offlaner(s).
-
Harassment: Use right-clicks and well-timed Cask bounces to zone the enemy. Your high base damage is a potent tool.
-
Pulling & Stacking: Use Cask to stack multiple jungle camps simultaneously at :53-.55 seconds. Secure pull camps with Cask if contested.
-
Kill Threat: At level 2, with a point in Cask and Maledict, you become a major kill threat with your lane partner. Communicate and look for opportunities.
Mid Game (Minutes 10-25):
-
Objective Focus: Use Voodoo Restoration to sustain pushes. Stay behind your team, ready to counter-initiate with Cask.
-
Vision Control: Plant deep wards to find optimal Death Ward locations for upcoming fights.
-
Target Selection: In fights, prioritize hitting key enemy cores with your ultimate. Don’t be afraid to use it to kill a single important hero.
Late Game (Minutes 25+):
-
Stay Alive: Your buyback and ultimate are critical. Positioning is paramount. Never show on the front lines.
-
Save Allies: Use Glimmer Cape and Force Staff defensively. A living core is more valuable than a risky Death Ward channel.
-
High Ground Defense: Witch Doctor is exceptional at defending high ground. A well-placed Death Ward can clear waves and deter sieges.
Part 4: Advanced Tips & Tricks
-
Fog Juking: Use the jungle fog to your advantage. Channel Death Ward from where enemies can’t see you.
-
Cask Creep Skip: In a desperate base race, you can use Cask on enemy creeps to delay their push by keeping them stunned.
-
Maledict Vision: If you suspect an invisible hero is nearby, casting Maledict in an area will briefly reveal them if they are cursed.
-
Instant Heal Toggle: You can toggle Voodoo Restoration on and off almost instantly to get one “tick” of heal for minimal mana cost, useful for triggering Magic Wand charges or a Mekansm heal.
-
Death Ward & Attack Modifiers: Remember that Death Ward benefits from your attack modifiers. This includes Skadi slow (with Agh’s), Critical Strike (not recommended), and armor reduction.
Frequently Asked Questions (FAQ)
Q: What is the best skill build for Witch Doctor?
A: The standard max order is Cask (Q) > Maledict (E) > Voodoo Restoration (W), taking Death Ward at 6, 12, and 18. However, in a passive or heavily harassing lane, you may take 2-3 points in Voodoo Restoration (W) early. Always take a value point in Maledict at level 2 or 4 for kill potential.
Q: Should I buy Aghanim’s Scepter every game?
A: It is your core damage item and should be targeted in most games. However, if your team desperately needs a Force Staff against Clockwerk or a Spirit Vessel against a healing-heavy lineup, prioritize those utility items first. Agh’s is a must-have by the late game.
Q: How do I deal with heroes that can cancel my Death Ward channel (e.g., Axe, Legion Commander)?
A: Positioning and itemization are key. Glimmer Cape (invisibility), Force Staff (repositioning), or Blink Dagger (initiating from fog) help you channel safely. Wait for enemies to use their key interrupt spells before committing your ultimate.
Q: Is Witch Doctor a good hero for beginners?
A: Yes and no. His skills are easy to understand, making him accessible. However, mastering his positioning, mana management, and landing his combo (Cask -> Maledict -> Ward) effectively separates good Witch Doctors from great ones. He’s an excellent hero to learn support fundamentals.
Q: What are Witch Doctor’s biggest counters?
A: Heroes with long-range disables or silences (Silencer, Skywrath Mage), gap-closing burst heroes (Storm Spirit, Anti-Mage), and heroes who can easily kill him during channeling (Axe with Berserker’s Call, Legion Commander with Duel). Item counters include Pipe of Insight (for magic resistance) and Orchid Malevolence/Scythe of Vyse (to lock him down).
Q: Should I get a Black King Bar (BKB) on Witch Doctor?
A: In the late game, if the enemy has multiple ways to interrupt your ultimate, a BKB can be a game-winning luxury item. It allows you to channel your full Death Ward duration without fear. However, it’s typically purchased after core utility items like Glimmer, Force, and Agh’s.
Conclusion: Embrace the Chaos
Witch Doctor is a hero that rewards game sense, creativity, and a touch of calculated madness. By internalizing the tips and tricks outlined in this guide—from perfecting the deadly Cask-Maledict combo to mastering the art of the hidden Death Ward channel—you will become an indispensable force on the battlefield. Remember, the true voodoo master doesn’t just cast spells; they orchestrate chaos, heal allies from the brink, and turn the tides of war with a well-timed stun and a cackle. Now, go forth and spread the malediction.
Credits: Dota 2 is a trademark of Valve Corporation. This guide is created for educational purposes by a passionate player.